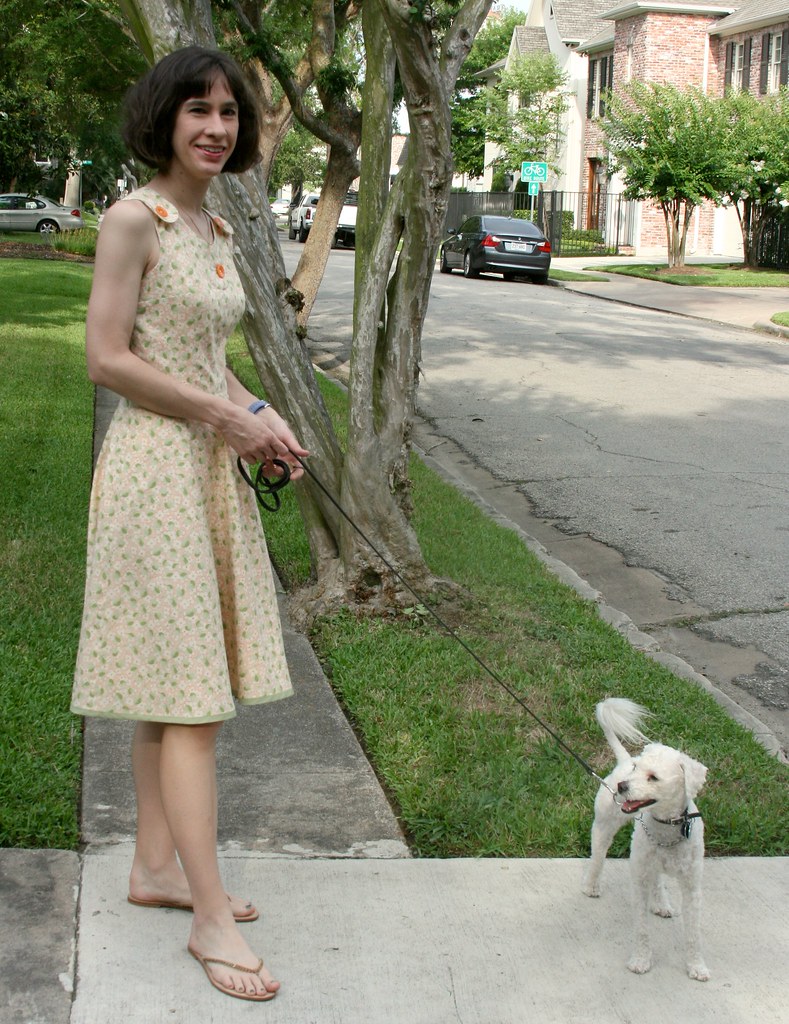
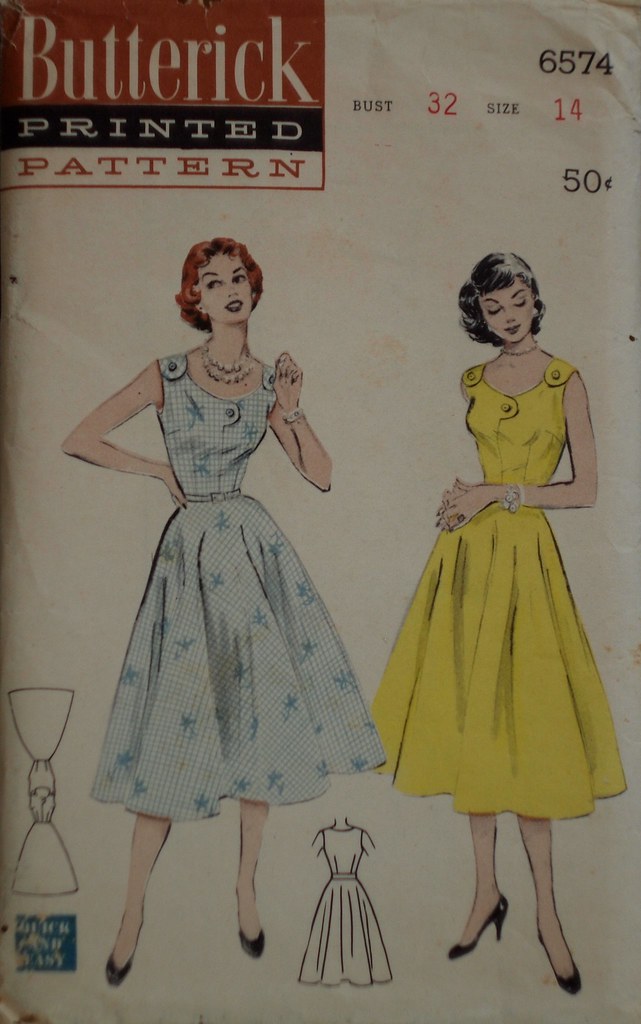
 So, I finally finished the second, better fitting version of Butterick 6574 (from 1953) yesterday. I think I am going to have to come up with cute names for these in the future -- I am tired of having to go look up the pattern number every time I want to write about something I'm making! Anyhow, the second version fits a whole lot better, so hooray! There is still room for improvement, but the remaining fit issues don't really bug me so I'm going to put this one in the win column.
 That's version number 2 at top left. I did quite a lot of alteration (for my beginner-ish self, anyhow) to get there. What I did not do is adjust the waist length (or even width, actually) and I am actually quite happy with the result! So thanks again everyone who gave me feedback on my earlier projects where I lengthened the waist. I agree that this works better!
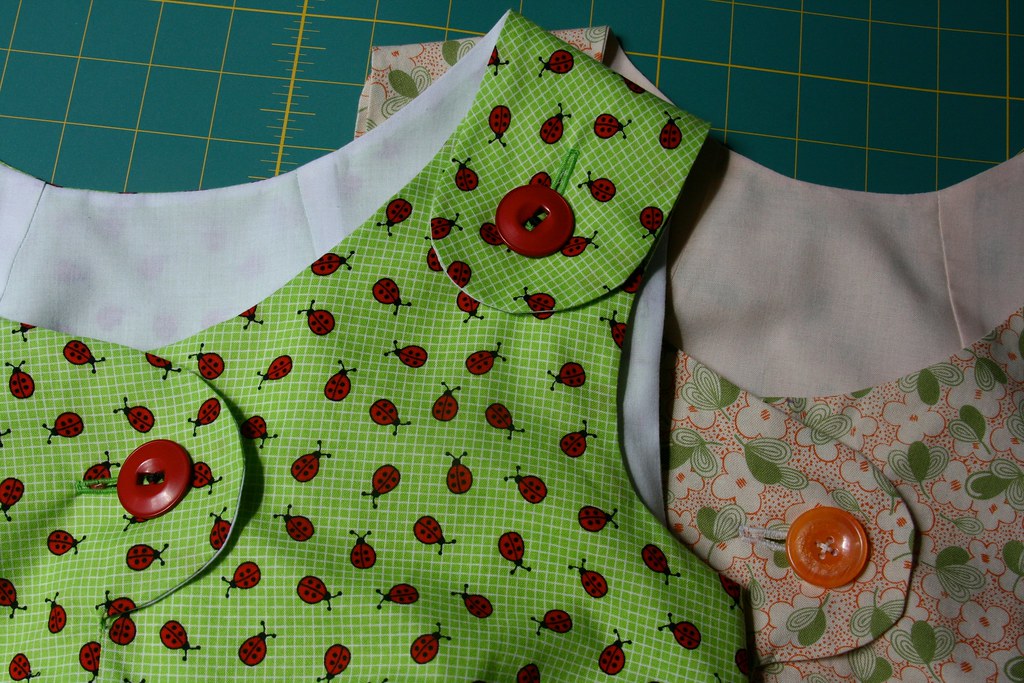
 I posted a picture of the re-drafted bodice pieces earlier, so I won't show that again, but here's an itemized list of the alterations I made:
FRONT BODICE:
1. Take a wedge out under the arm hole, tapering to nothing at the waist. I did this a couple of times, as the drafting progressed, so I'm not sure how much the total amount was.
2. Rotate bust darts up slightly -- this one was very easy to do.
3. Rotate shoulder strap position inward. (The original version was hanging off my shoulders!)
BACK BODICE
1. Add darts at the neckline, pointing at the tops of the waist darts. This helped a lot with the extra fabric I had going on in back, but there is still some unresolved looseness where the darts taper off.
2. Take some extra out under the arms.
3. Rotate shoulder strap position inward.

All the pictures I took of Butterick 6574 are here in my Flickr stream. And keeping me company here is my dog, Dinky.
I had this problem, and then some, with Pattern Bureau 2224, which was an unmitigated disaster and will have to be completely redrawn if I ever make it again. And the pattern illustration is so irresistibly cute!
ReplyDeleteI swear I had at least ten inches of extra fabric flapping around the bodice. That's not including the ease--I could have taken up that much before the thing fit normally, much less was tight. Now, I know women wore serious undergarments then, but this sucker was drafted like it was meant for a football player in a corset.
I was so disappointed.
What a fantastic dress! And you've done a brilliant job of finishing those round bits at the front - those things are DANGEROUS.
ReplyDeleteClever girl :)
I love both versions of the dress. The fabric choices are so cute. I admire your patience in adjusting and fitting the original. And I am in love with Dinky. What a cute puppy!!!!!!
ReplyDeleteBoth dresses are great! I really love your fabric stash on your Flickr!
ReplyDeleteI found you on sew-retro. I love this dress. It is so cute on you! I also noticed the green bias tape at the hem of your second dress but had no idea that's what it was. I just thought it was a great design element. Well done!
ReplyDeleteThis is such a lovely dress - it flatters you well! It like the design of the bodice : )
ReplyDeleteIt's gorgeous! I got your package yesterday, by the way. The skirt fits and the patterns are awesome. Thank you so much!
ReplyDeleteSophie
Cute dresses! Love the little button detail, you picked a really pretty retro pattern!
ReplyDeleteI love both dresses. Funny about the fitting issues. I have had the opposite problem with vintage...too small! I've mostly used Simplicity patterns from the 60's. Maybe they ran smaller than butterick.
ReplyDeleteIt's amazing the difference just making those extra alterations make to the finished look. The green dress is really nice but the yellow is gorgeous on you. Such a lovely fit, you were right about the length too that is just perfect. They are both so well made too.
ReplyDeleteI do find all patterns (not just vintage ones) very hit and miss sizewise. For that reason I made myself a basic bodice pattern block out of non fusible interlining to use as a guide. Its quite form fitting but with the kind of ease I like (so would fit much like your yellow one). I use it as a starting point when making muslins and find it's been a great help.
Thanks for the kind comments, everyone! I'm hoping that I can use this pattern as a guideline for fitting others in the future. I'm wondering if "vanity sizing" (if that's what's going on here) started at a certain point in pattern history. The two 40s patterns I've sewn were both pretty true to size, but that's not much of a sample to go by.
ReplyDeleteLily -- for what it's worth, I was able to get the curved parts close to right by actually drawing the seam line onto the lining. It made a huge difference!
Your dresses are adorable! You did a great job of re-working the pattern.
ReplyDelete